Key takeaways
- Wear the goggles you normally use when trying on a helmet.
- Fasten the chin strap, leaving room for roughly two fingers beneath it.
- Open and close your mouth; the helmet should not shift backward.
- Keep the front edge level, about one to two finger-widths above the eyebrows.
- Do not compensate for a poor shell shape by wearing a thick hat underneath.
The best ski helmets for most resort skiers are the Smith Vantage MIPS for all-round performance, the Giro Jackson MIPS for value and low weight, and the POC Obex MIPS for a clean, adaptable fit; backcountry users should prioritize a lightweight, well-ventilated helmet such as the Salomon MTN Lab rather than simply choosing the warmest resort model.
Our top picks

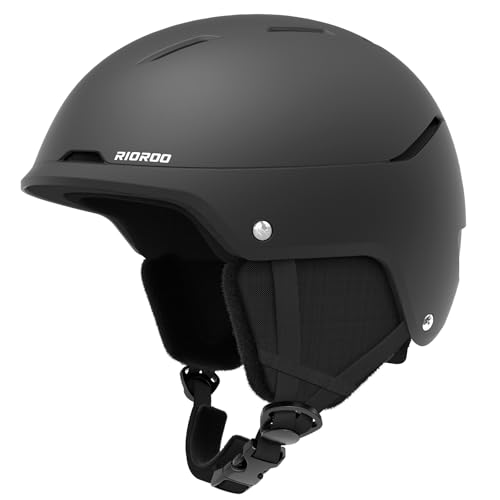

As an Amazon Associate we earn from qualifying purchases at no extra cost to you. Ratings are shown as listed on Amazon.
Best ski helmets by situation
| Situation | Best match | Why it fits | Typical 2026 price range |
|---|---|---|---|
| One helmet for frequent resort use | Smith Vantage MIPS | Adjustable fit, hybrid construction, controllable ventilation, strong goggle integration | $200–$280 |
| Lower-cost resort skiing | Giro Jackson MIPS | Light in-mold build, simple adjustment, effective passive ventilation | $100–$160 |
| Warmth and premium goggle compatibility | Oakley MOD5 MIPS | Deep coverage, removable lining components, generous goggle interface | $180–$250 |
| Customizable fit and all-mountain use | POC Obex MIPS | Comfortable retention system, adjustable vents, broad size range | $150–$230 |
| Touring and uphill efficiency | Salomon MTN Lab | Lightweight design and substantial ventilation for climbing | $180–$260 |
| Durability-focused premium use | Sweet Protection Trooper 2Vi MIPS | Hard-wearing construction, deep protection, adjustable ventilation | $220–$300 |
Prices are broad market ranges rather than fixed recommendations. Seasonal discounts can move a helmet considerably below its usual range, but safety certification, fit, and condition matter more than the discount.
What separates the best ski helmets
1. Fit system: the deciding factor
A helmet that moves when you shake your head is not a good fit, even if its safety technology is excellent. Most quality helmets use a rear dial or ratchet that tightens a cradle around the head. The adjustment should contact your head evenly without creating a pressure point at the back of your skull.
Measure around your head approximately 2.5 cm above the eyebrows and ears, then compare that measurement with the manufacturer’s size chart. A typical medium covers roughly 55–59 cm, while a large often covers about 59–63 cm, but the exact ranges vary. If you are between sizes, try both: head shape matters as much as circumference.
- Wear the goggles you normally use when trying on a helmet.
- Fasten the chin strap, leaving room for roughly two fingers beneath it.
- Open and close your mouth; the helmet should not shift backward.
- Keep the front edge level, about one to two finger-widths above the eyebrows.
- Do not compensate for a poor shell shape by wearing a thick hat underneath.
Some models include interchangeable fit pads or adjustable ear pads. These can solve minor comfort issues, but they cannot turn a round helmet into a suitable fit for a long, narrow head.
2. Ventilation versus warmth
Warmth is useful on chairlifts, in wind, and during slow beginners’ lessons. Ventilation becomes more important during spring skiing, steep descents, and uphill travel. A helmet with fixed vents may be warm and simple, while adjustable vents let you close airflow on cold lift rides and open it during strenuous skiing.
The Smith Vantage MIPS, Oakley MOD5 MIPS, POC Obex MIPS, and Sweet Protection Trooper 2Vi MIPS are particularly versatile because their ventilation can be managed rather than accepted as fixed. For touring, the Salomon MTN Lab’s lower weight and more open airflow are usually more valuable than maximum insulation.
Warmth also depends on the liner, ear pads, and eyewear. A thin merino or synthetic skull cap can add comfort, but it changes the fit. Never use a thick beanie that forces the helmet upward or leaves looseness around the sides.
3. Goggle integration
Goggle compatibility is more than matching the brand logo. The helmet and goggles should meet without a large gap across the forehead, while the goggle strap must sit securely in the helmet’s rear retention channel. A small gap can be acceptable, but a large “gaper gap” exposes skin to wind and can allow snow to collect.
Try the complete system together. Check whether the helmet pushes the goggles down onto your nose, whether the goggle frame contacts the helmet’s front rim, and whether the rear strap stays centered. Brand-matched combinations often integrate easily, but they are not automatically compatible; different goggle sizes and face shapes still matter.
4. Impact protection and construction
Look for a recognized snow-sports certification such as ASTM F2040, CE EN 1077, or an equivalent regional standard. MIPS and similar low-friction systems are designed to allow limited movement between layers during certain angled impacts. They are an additional design feature, not a guarantee against injury.
In-mold helmets bond a thin outer shell to an expanded-polystyrene foam liner. They are often light and comfortable. Hard-shell helmets generally use a separate, tougher outer shell and can tolerate cosmetic abuse well. Hybrid helmets combine approaches and often provide a useful balance of durability, weight, and adjustability.
No helmet should be treated as reusable after a significant impact. Foam can be compromised without obvious exterior damage. Replace a helmet after a crash, even if the shell looks normal, and follow the manufacturer’s replacement guidance for age and condition.
Head-to-head: the main choices
| Helmet | Construction and protection | Published weight class | Ventilation | Best for |
|---|---|---|---|---|
| Smith Vantage MIPS | Hybrid shell with MIPS | About 500–550 g, size dependent | Adjustable front and rear vents | Frequent resort and all-mountain skiing |
| Giro Jackson MIPS | In-mold shell with MIPS | About 400–450 g | Fixed passive vents | Value-conscious resort skiers |
| Oakley MOD5 MIPS | Hybrid shell with MIPS | About 550–600 g | Adjustable vents | Warmth, coverage, and large goggles |
| POC Obex MIPS | In-mold construction with MIPS | About 450–500 g | Adjustable vents on selected versions | Comfort and adaptable fit |
| Salomon MTN Lab | Lightweight climbing-oriented shell | About 350–400 g | High airflow | Backcountry touring |
Weights vary by size, certification version, removable accessories, and production year, so treat the figures as comparison bands rather than exact promises. For resort use, a difference of 100–150 g is usually less important than a stable fit and comfortable liner. During long climbs, that difference becomes more noticeable.
Resort or backcountry: choose for the effort you actually make
Resort skiers often benefit from a warmer liner, adjustable vents, and easy goggle compatibility. The Smith Vantage MIPS is a strong one-helmet solution, while the Giro Jackson MIPS offers a lighter, less expensive route if you do not need adjustable airflow. The Oakley MOD5 MIPS is worth considering if you wear larger goggles or prefer deeper, warmer coverage.
Backcountry users need to separate uphill and downhill requirements. A touring helmet should vent heat efficiently, avoid unnecessary bulk, and remain secure when carried or worn for several hours. The Salomon MTN Lab is oriented toward that use. However, some touring-focused helmets sacrifice warmth and may not feel ideal on cold resort days. If your trips are mostly lift-served with occasional short tours, an adjustable all-mountain helmet may be the better compromise.
Ownership details that affect value
The first parts to wear are usually the removable pads, chin-strap padding, adjustment cradle, and goggle-retention band—not the visible shell. Sweat, sunscreen, and repeated compression can flatten liners and create odors. Replacement pads may restore comfort, but replacement parts are not universal, so check availability before buying an uncommon model.
- Remove the liner only as the instructions allow and wash it with mild soap and cool water.
- Air-dry pads fully; do not use a radiator, tumble dryer, or high heat.
- Wipe the shell with water and a soft cloth rather than solvents or abrasive cleaners.
- Inspect the foam, shell, buckle, vents, and retention dial at the start of every season.
- Store the helmet dry and away from direct sunlight, heaters, and sharp equipment.
- Do not drill extra vents, modify the shell, or add adhesive accessories over damaged areas.
A simple cost-per-use calculation helps explain why a well-fitting helmet can be sensible. A $220 helmet used 30 days per season for four seasons costs approximately $1.83 per ski day before replacement parts. A $100 helmet that causes pressure or overheating and is replaced after one season costs more than $3.30 per day. The cheaper option is worthwhile only if it fits securely and remains comfortable enough to use consistently.
Final buying checklist
Choose the best ski helmets by testing the complete setup, not by comparing features in isolation. Confirm the certification, measure your head, try the helmet with your goggles, test the retention dial, and check that ventilation matches your activity. For mostly resort skiing, favor fit, warmth, and adjustable airflow. For touring, favor low weight and ventilation, while still choosing a certified helmet designed for the conditions you expect to encounter.